Shag and Wolf Cut With Scissors: Plan, Steps and Tools
By SalonScissors editorial team Updated
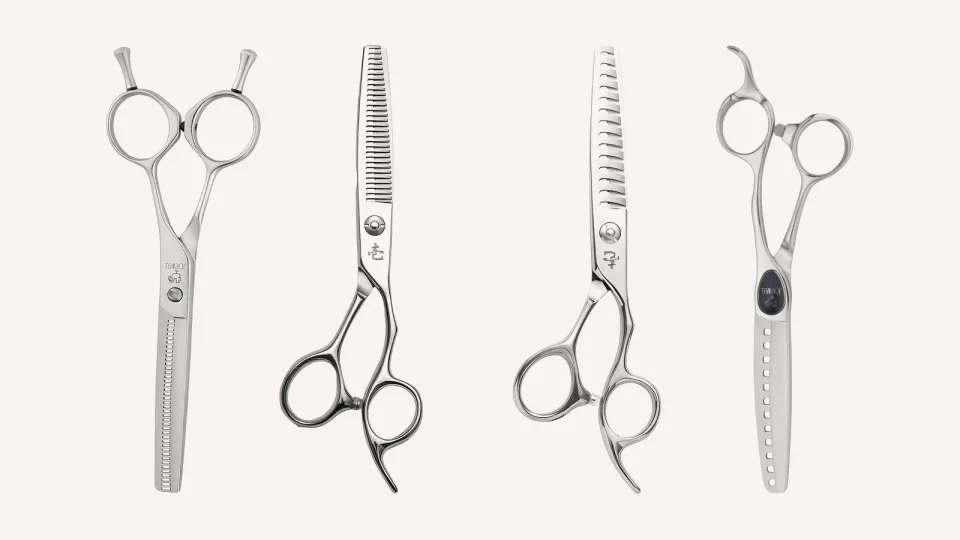
A shag is a heavily layered cut that shows its steps, with feathered ends and strong face framing. A wolf cut is its close relative, with a deliberate break between short, rounded top layers and longer layers at the nape. Both are built in the same order: structure first, then texture.
How we chose: Method follows common teaching practice, and trainers name the moves differently. Reviewed 4 November 2026. We sell scissors and haven’t run cutting tests.
What is the difference between a shag and a wolf cut?
A shag shows its layers on purpose. You get visible steps, feathered ends and usually curtain-style face framing. A wolf cut takes that idea and adds contrast: short-to-medium top layers that round into volume, with longer, thinner layers flowing below the nape. The pinched area between them is the part that makes it a wolf.
Remember the warning: if you connect all the top layers to the base, you have an ordinary layered cut. The disconnect at that waist is the wolf cut.
How do you plan the cut?
A wolf cut has three parts you can decide on before you start:
- Base: one-length, graduation or layers, depending on the length you want. It sets the overall shape.
- Face frame: the main design point. Decide how short, how wide and how connected it will be.
- Top layers: how many, and how short. More layers means a heavier, shaggier look.
A shag follows the same logic with strong layering throughout. Choose your lift angles from the layering structure you want. Training systems for the shag often describe high elevation with a diagonal cutting line, which gives feathered, choppy ends. Our elevation and over-direction guide explains how the angles work, and how to cut layers covers the sectioning.
How do you build it, step by step?
-
Section the head clearly
Separate the top, face frame and nape so you can cut each zone to its own guide.
-
Cut the structure first
Use a cutter to set the layers. For a wolf cut, cut the shortest zone first as your fixed reference, then build the longer sections around it so the break doesn’t drift.
-
Plan where the break falls
An accidental disconnect looks like a mistake. A planned one looks like design.
-
Soften the transitions
Slide cutting and point cutting help blend where you want softness.
-
Cross-check
Re-part across your work and tidy anything that sticks out. Our cross-checking guide shows how.
-
Texturise last
Work on dry, styled hair if you can, and check the result as the hair falls.
What do point cutting, chipping and piece cutting add?
They add the texture that makes the cut look finished. Names vary between teachers, so describe the motion rather than relying on the word.
- Point cutting: the tips of the scissors cut into the ends, which breaks up a line. Shallow entries soften the edge, and deeper entries remove more weight. Our point cutting guide has the steps.
- Chipping: some teachers use this for a steeper, more angular entry with a more visible effect, and others use it as another name for point cutting. Check which meaning your trainer uses.
- Piece cutting: you pick individual bundles by eye on dry hair and cut each one to create defined groups of strands. It suits shaggy finishes where strand separation is part of the look.
Go gently on coarse straight hair and natural curls. Taking too much weight from the ends can make straight hair stick out and curls expand.
Which tool does which job?
| Job | Tool |
|---|---|
| Structure and layers | A cutter you can control and see the tips of |
| Soft end texture | The same cutter, point cutting |
| Visible separation, more removal per bite | A texturising scissor |
| Bulk reduction | A thinning scissor, used carefully |
“Texturising scissor” is a trade term, not a standard. It often means wider, fewer teeth, but makers use the word differently, so read the model’s description before you assume. Start light, close once per section and recheck, because you can’t undo removal during the service. Our texturising and chunking post compares the options, and texturising and thinning by hair type covers placement.
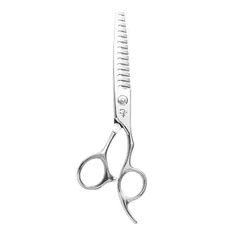
Ichiro 16T Texturizing Scissors
Best for 16 V-shaped teeth for deliberate weight and movement
A$229.95
View Ichiro 16T Texturizing ScissorsTo browse more, see thinning and texturising scissors.
Common questions
Can I cut a shag with one pair of scissors?
Yes. A cutter can build the layers and do the point cutting. Add a texturising tool if you want more removal.
How do I keep the wolf cut disconnect?
Cut the zones to their own guides and don’t blend them. Decide where the break falls before you begin.
Wet or dry?
Many stylists cut the structure wet and texturise dry. Choose what suits the method and how the client wears their hair. See wet or dry cutting.
Is it a beginner cut?
It’s usually taught as advanced. Practise layering and point cutting first.
Next step
Not sure your layering is ready? Work through how to cut layers first, then come back to the disconnect. The slide cutting guide covers the softening step.
Further reading
For a reference on cutting terms, Scissorpedia is an information site about hair scissors. SalonScissors is part of the ShearAlliance, working with other trusted scissor websites. More topics are in the knowledge base.