Texturising and Thinning Scissors by Hair Type
By SalonScissors editorial team Updated
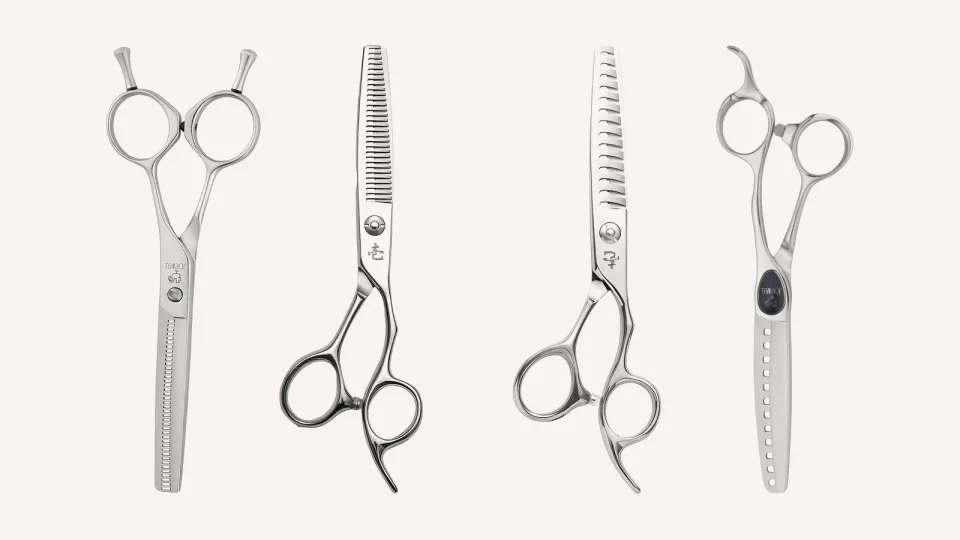
Thinning and texturising scissors remove or break up hair through the teeth, and how much they should take depends on the hair. Fine hair wants the lightest touch, thick hair can take more, and curly hair needs the most care because removing hair changes how the curls group and hold.
How we chose: Notes follow standard cutting practice and Joewell’s thinning manual. Reviewed 4 November 2026. We sell scissors and haven’t run cutting tests.
What is the difference between thinning and texturising?
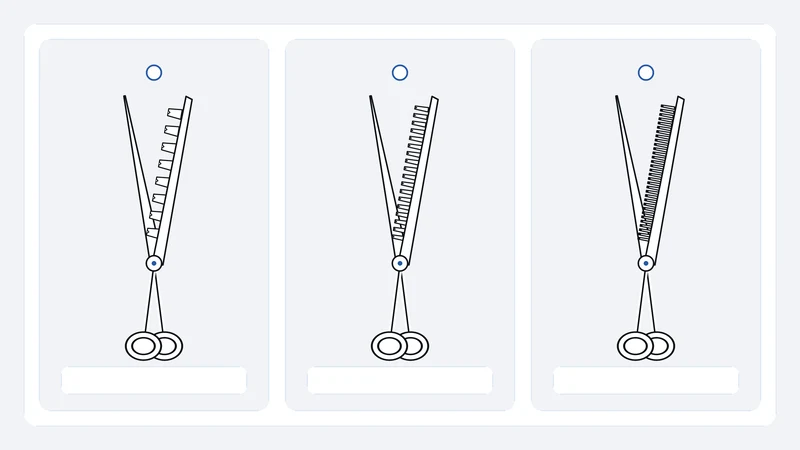
Both use scissors with teeth on one or both blades. A thinning scissor, or blender, has many fine teeth, and it takes out a small amount of hair each time you close it. A texturiser has fewer, wider teeth, and it removes more in visible pieces. Makers use the names differently, so look at the teeth, not the label.
Tooth count only tells part of the story. Joewell says the cut ratio depends on both the number and the shape of the teeth. Our guide to thinning cut ratios explains how to read the maker’s figure, and the thinning shears guide compares the types.
How should you use them on each hair type?
| Hair | What to reach for | How to use it |
|---|---|---|
| Fine, straight | A fine blender | One light pass at the ends. Many fine heads need none. |
| Medium | A blender, then a texturiser if needed | Soften lines first. Add texture only where you want it seen. |
| Thick, straight | A blender or texturiser | Work thin sections from mid-length to ends, then check weight |
| Wavy | A blender, used lightly | Judge dry, because waves bunch up when the weight comes out |
| Curly and coily | Often a cutter only | If you use a thinner, go sparingly, on dry hair, curl by curl |
Fine hair
Fine strands show every missing hair, so the margin is small. Use a fine blender at the ends only, with one pass, and look before you decide on a second. Over-thinning leaves ends that look see-through.
Medium and thick hair
Medium hair gives you room to soften a line or lift a heavy end. On thick hair, work in thin sections and place the thinner from mid-length toward the ends, not near the roots. Check how the hair falls after each pass. Heavy density usually asks for more removal, but fewer, smaller bites are safer than a few big ones.
Wavy and curly hair
Curl shape depends on hair staying in groups, so removing hair can change how the curls sit and support each other. The perimeter can also look thinner once curls shrink. Many curl specialists prefer a cutter, working curl by curl on dry hair. If you do use a thinner, take a little and judge the result dry. Our guide to scissors for curly and coily hair covers the principles.
How do you apply it, whatever the hair type?
- Cut the shape and the outline first. Weight removal comes last.
- Take a thin section and hold it with light tension.
- Start from mid-length and move toward the ends. Stay away from the roots, where short pieces can stick out.
- Close once, then check. Don’t repeat closures in the same spot.
- Comb through and look at the section in its natural fall before moving on.
Which thinner should you own first?
If you cut a mix of hair types, a fine-toothed blender covers the most ground. It softens lines on fine and medium hair, and it takes a measured amount off thick hair when you make a few passes. A more open texturiser is a second tool for when you want visible, broken texture, and it earns its place once you know how often you reach for it.
Before you buy, look at the maker’s cut ratio where one is given, the tooth spacing, and whether the pair comes in your hand. Left-handed stylists need a true left-handed thinner, as we explain in our guide to left-handed thinning scissors.
Common mistakes
- Thinning near the roots. Short hairs push up and can stick out.
- Using the same pass on every head. Fine, thick and curly hair each need a different amount.
- Thinning to fix a bad line. If the outline is heavy or uneven, return to your cutter.
- Using a texturiser where a blender would do. An open-toothed tool takes more per closure and leaves less room to correct.
- Judging wet. Check texture and weight on dry hair.
Common questions
Can thinning scissors be used on fine hair?
Yes, with care. Use a fine blender, a light touch and one pass at the ends. Many fine heads need no thinning.
Should I thin curly hair?
Often not. Removing hair can change how curls group and hold, so many stylists use a cutter and work curl by curl. If you do thin, go sparingly and check dry.
Do more teeth mean more hair removed?
Not reliably. The shape and spacing of the teeth matter as much as the count. The maker’s cut ratio, where one is given, is a better guide. See our cut ratio guide.
Do I need a thinner in my first year?
Some courses ask for one for blending, and a 30-tooth blender is the usual first thinner. Check your course list. Our apprentice scissor kit guide covers what to buy first.
Next step
Match the tool to the hair you cut most. Browse thinning shears or compare the types in our thinning and texturising guide.
Further reading
For definitions of toothed tools and cut ratio, Scissorpedia is a reference site about hair scissors. Scissorpedia is a fellow member of the ShearAlliance (see ShearAlliance). More topics are in the knowledge base.