Chipped or Nicked Edge: What Happened and What to Do Next
By SalonScissors editorial team Updated
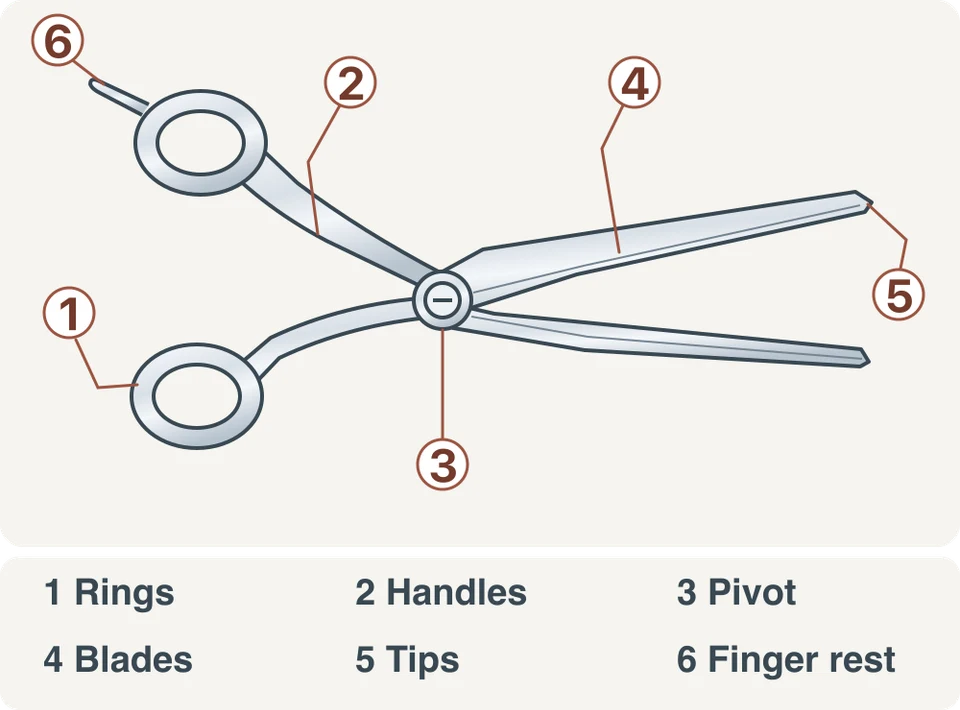
A nick or chip is a small damaged spot on the cutting edge. Your scissors catch at exactly the same point every time they close, or you see a tiny bright dent. The next step is the same every time: stop using them on clients, protect the blades and see a qualified professional sharpener.
How we chose: Steps follow maker care guidance and common salon practice. Reviewed 4 November 2026. We sell scissors and haven’t run cutting tests.
What is the cutting edge, and what is a nick?
The cutting edge is the sharpened line along each blade that actually cuts the hair. It runs from the heel, near the pivot, to the tip. A nick or chip is a small piece missing from that line, or a dent in it, so the two edges no longer meet smoothly at that point.
That’s why the symptom is so specific. Instead of “they feel a bit off everywhere”, you get “they catch right there”.
What causes a nick?
Most are linked to an event you can often remember:
- A drop. A hard floor is the classic cause. A drop can chip an edge, bend a tip or change the alignment of the blades, sometimes with nothing visible. The dropped scissor plan goes through what to do in the first few minutes.
- Blade-on-metal contact. Scissors loose in a drawer or kit with other metal tools.
- Cutting the wrong thing. Clips, pins, packaging or other non-hair material.
How much damage follows depends on how hard the knock was, how the scissors landed and how they’re built. Assume any pair can chip, whatever the steel or the price. Yasaka warns that a drop or knock can chip a blade.
Nick or dull: what’s the difference?
A nick is one fixed spot. Dullness is everywhere along the edge and gets worse gradually. Use this table to sort what you’re seeing, and keep your fingers off the edge for every check.
| What you notice | Likely cause | What to do now | Next step |
|---|---|---|---|
| Catches at the same spot every close, or a bright dent under strong light | Nick or chip | Stop using on clients. Close and protect the blades | Qualified professional sharpener |
| A new catch, scrape, changed sound or dead spot after a drop | Chip or changed alignment, possibly with nothing visible | Stop. Take a photo and note the height, the surface and whether the scissors were open or closed | Qualified professional sharpener |
| Hair folds or pushes everywhere, getting worse gradually | Loose tension, a gummed pivot or a dull edge | Clean and oil the pivot and check tension as your maker’s care guide describes | If it still folds, a professional sharpener |
| Snagging only when you slide cut | The edge type may not suit sliding | Check your edge type in our edge guide | Not always a fault. A professional can advise |
| Thinning scissors tug or catch | Hair or product packed between the teeth | Clean between the teeth gently | If it persists, a sharpener experienced with toothed blades |
If the whole edge is the problem rather than one spot, our post on why scissors fold hair takes you through the checks in order.
How do you check without making it worse?
Look, don’t touch. Don’t drag a fingernail or fingertip along the edge, even to feel for the nick.
-
Close the blades slowly with no force
Listen and feel for a catch at a repeating point. Stop at once if you feel a scrape.
-
Don’t cycle a damaged edge
Repeated closing against a nick can add to the damage.
-
Leave the tension screw alone
Tension changes won’t fix a nick, so don’t tweak it to force the blades through.
A smooth action after a quick tension check doesn’t clear the edge and alignment, so any new symptom after a drop still deserves a professional look.
What should you do next?
The same three steps, every time:
- Stop using the scissors on clients. A nicked edge snags and pulls hair, and carrying on won’t improve it.
- Keep them closed and protected in a case or pouch, away from other metal tools.
- Take them to a qualified professional sharpener. They can assess the damage and tell you what’s possible. Our guide on what to ask a sharpener lists good questions, such as whether they service your exact edge type. The sharpening prep post shows how to pack the pair and write the note.
Never attempt a home repair. Reshaping an edge takes the right equipment and skill, and a home attempt can permanently change the geometry. A backup pair keeps you working while yours is away.
Common questions
Can a nick be repaired?
That’s for a professional sharpener to assess. They can tell you what’s possible for your pair.
Can I keep using them on clients until they’re serviced?
No. A nicked edge catches and pulls hair, so keep the pair away from clients and use your backup.
Do I need to sharpen after every drop?
Not necessarily, but a hard drop or any change in the action is worth a professional check, even with no visible chip.
How do I prevent nicks?
Keep the blades closed, case them between clients and don’t leave them loose with other metal tools. The salon day care routine builds that into your day.
Next step
Ask us about sharpening with the model and what happened. If you’re unsure what a good service looks like, the checks after service tell you what to look for when the pair comes back.
Further reading
For a reference on scissor parts and edges, Scissorpedia is an information site about hair scissors. SalonScissors is part of the ShearAlliance, working with other trusted scissor websites. More topics are in the knowledge base.