Top 10 Point Cutting Tips for Softer, Cleaner Ends
Ten point cutting tips for stylists and apprentices: when to use it, how deep to snip, how to hold the scissors and how to check the finish dry.
By SalonScissors editorial team Updated
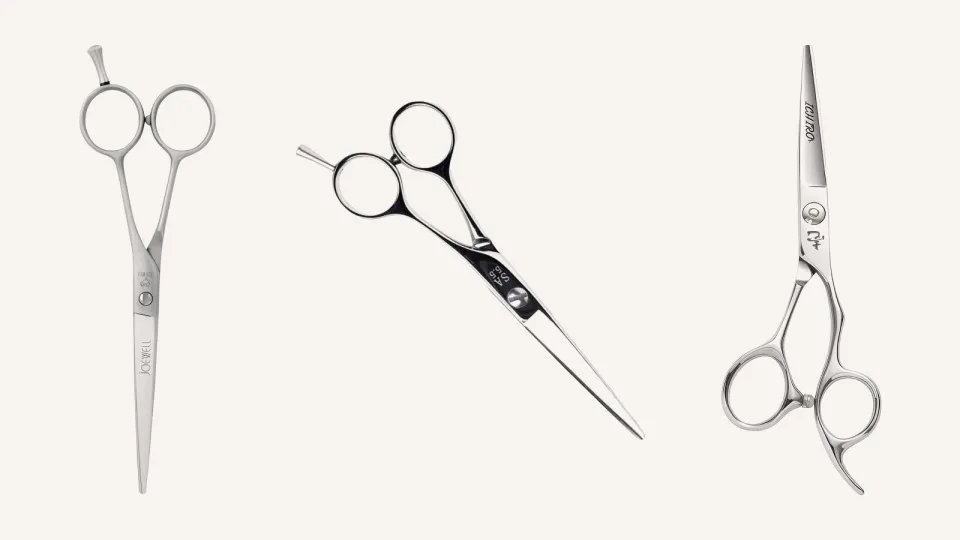
Point cutting works best as small, shallow snips into a line you’ve already cut cleanly. These ten tips cover when to use it, how deep to go, how to hold the scissors and how to check the result.
How we chose: Ten tips ordered as they come up in a cut. We sell scissors and haven’t run cutting tests. Reviewed 4 November 2026.
More on how we chose
1. Know what point cutting is for
Point cutting means snipping into the ends with the tips of the scissors instead of closing straight across. It breaks up a hard line, softens the ends or takes a little weight out of an edge. It doesn’t shorten hair, so it’s a finishing move rather than a way to find a length.
| Job | Reach for |
|---|---|
| Set the length and the shape | A blunt cut |
| Soften a hard line or break up the ends | Point cutting |
| Take weight out inside the shape | A thinner, after the outline |
| Glide through a section | Slide cutting, on a blade the maker describes for it |
2. Cut a clean line first
If the line wobbles, point cutting just gives you a soft wobble. Cut the blunt line, check the length and balance, then soften it. Our guide to cutting techniques shows where each move sits.
3. Hold the section with steady tension
Comb the section smooth and hold it between your fingers with the same light tension on every snip. Slack hair shifts under the blades, and the bites come out uneven. Keep your fingers well behind the tips, because you’re working a few centimetres from your own hand.
4. Point the tips into the ends
Turn the blades so the tips run the way the hair falls, then snip up into the ends of the section instead of across it. The more upright the scissors, the more the last few millimetres of the blades do the work. That’s why tip control matters more than blade length here.
5. Start shallow, then go deeper
Depth sets the effect. A shallow snip leaves a soft, slightly broken edge, and a deep one leaves visible notches. Begin with the shallowest snips you can place, then go deeper only where the hair needs it. You can always take more, but you can’t put it back.
6. Keep the spacing even
Work along the section at a steady rhythm with the same depth each time. Random, quick bites leave patches, which is the point-cutting version of a rushed blunt line. Slow down until the pattern is regular, then speed up.
7. Match the depth to the hair
Fine or thin ends have little to spare, so keep the snips shallow. Dense, heavy ends can take more depth before the edge looks broken. On curls, work curl by curl and keep it light, as our curly hair tips explain.
8. Look after your tips
A point cut puts the work on the last few millimetres of the blades. If a tip is nicked or bent, it snags and leaves ragged ends. Stop cutting with it: Kasho advises against cutting with nicked blades until they’re fixed. If hair folds at the tips, our guide to dragging scissors walks through the checks.
9. Choose a grip you can hold upright
Joewell recommends symmetric handles for point cutting, because you hold the scissors upright. Symmetric means the rings sit in matching positions, as on a classic straight handle. Offset pairs point cut too, so use the layout you place best, and see the scissors for each haircut for shorter and longer options.
10. Check it dry, then stop
Comb through, shake it out and look from the front and the side, in the parting they’ll wear. If the line still looks hard, go a little deeper in that spot only. Our plan-and-check guide lists the finish checks. Then stop, because over-softening is harder to fix than a line that’s a touch firm.
Five point cutting mistakes to watch for
- Going deep on the first pass. Start shallow. Depth is the one thing you can’t undo.
- Letting the scissors lie flat. Flat blades close across the section and shorten it. That’s a trim, not a point cut.
- Using one depth everywhere. The perimeter, the front and the nape rarely want the same amount.
- Fixing a bad line with snips. If the line is wrong, cut it again first.
- Skipping the dry check. Wet hair hides how broken the edge will look once it settles.
A simple way to practise
-
Cut a blunt line
Cut one straight section and check it’s level before you do anything else.
-
Snip at three depths
Point cut thirds of the section at a shallow, medium and deeper depth. Keep the spacing the same.
-
Compare and write it down
Comb through, look at the three edges side by side and note which depth gave the softness you wanted.
Common questions
Can I point cut with any scissors?
Yes, any cutter in good condition can. Fine tips you can see and a grip that holds the blades upright matter more than the price. Check the tips for nicks first.
Should I point cut wet or dry?
Both are used. Wet gives you control while you cut, and dry shows how the hair will sit. Whichever you choose, check it dry before you finish.
Is point cutting the same as texturising?
They overlap in effect, since both soften. Point cutting uses the tips of a cutter and you control every snip, while texturising scissors break up the hair with their teeth. Our thinning and texturising guide compares the toothed tools.
How do I stop it looking choppy?
Use smaller, shallower, evenly spaced snips on a section held with steady tension. Choppy usually means too deep or too uneven, so take less and check it dry.
Next step
Practising on a mannequin? Write down the depth and spacing you used, so you can change one thing at a time. The apprentice checklist has a record page. More guides are in our knowledge base.
A straight handle with level rings suits an upright grip. This one’s right-handed only:
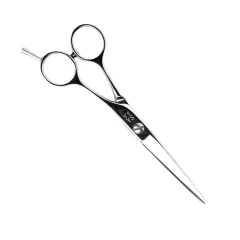
Yasaka SA Classic Precision Scissors
Best for level rings for an upright grip
Comparing scissors for your kit?
Tell us what you cut and which scissors you are comparing.
Useful next reading
Read all blog posts
Top 10 Layering Tips for Cleaner, More Even Layers
Ten layering tips for stylists and apprentices: guide lengths, sectioning, elevation, tension, travelling guides and cross-checks, plus when to thin.
Top 10 Questions Apprentices Ask About Their Scissors
Ten questions apprentices ask once the scissors are in hand: tension, oil, tired hands, left-handed use, folding hair, sharpening, borrowing and drops.